painting floor

Painting Garage Floor? Here’s How to Get Professional Results at Home

Painting a garage floor is one of the most practical upgrades for any home or workspace. It not only makes the space look cleaner and more finished but also protects against oil stains, moisture, and daily wear. Whether you’re using basic concrete paint or a more durable epoxy coating, achieving professional-looking results depends on choosing the right products and following each step carefully. From preparation to finishing touches, every stage contributes to how long the coating will last and how good it will look.

Let’s walk through the process of painting a garage floor like a pro.

Table of Contents

Key Takeaways

Choose the appropriate garage floor coating and gather all tools and materials before starting

Ensure the floor is clean, dry, and free of damage so the paint sticks properly.

Use a quality primer to improve adhesion and extend the life of the garage floor paint.
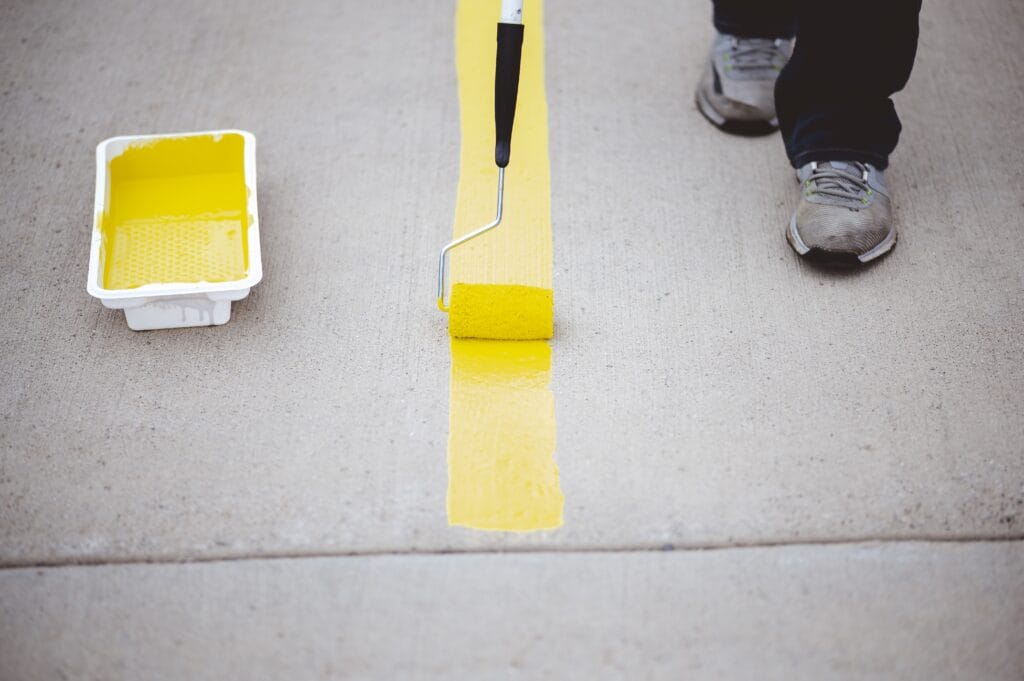
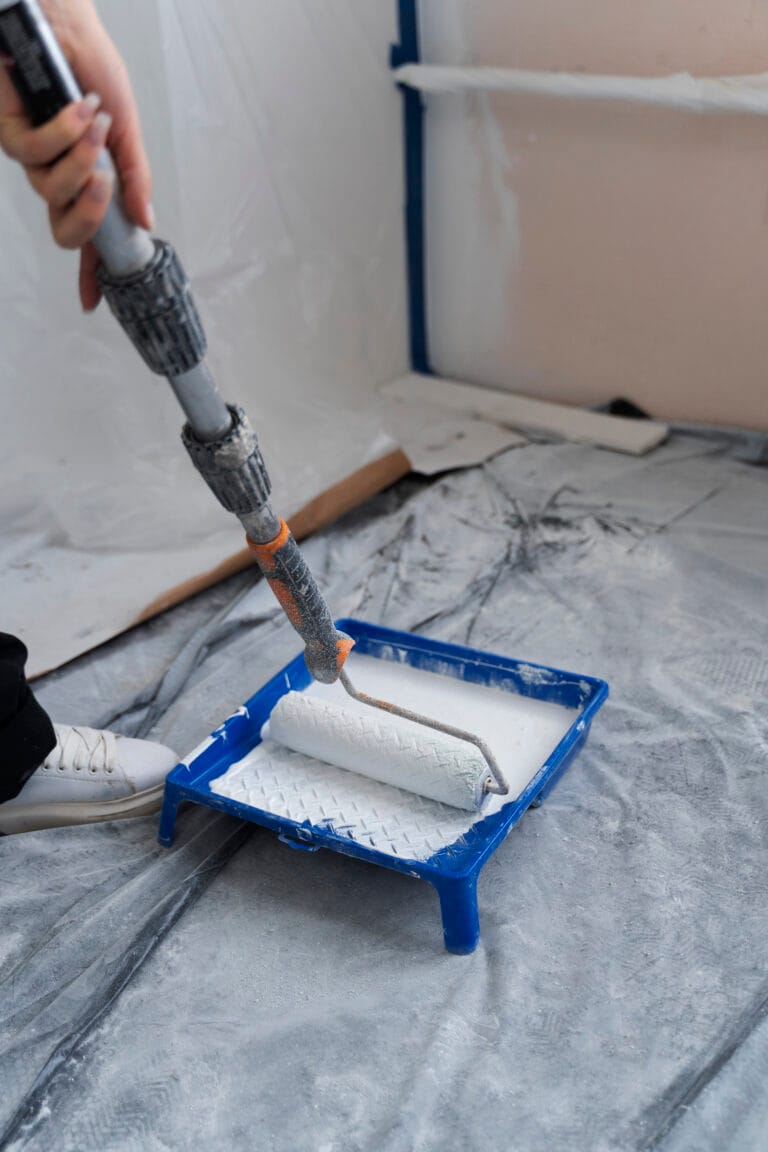
Apply the paint evenly with a roller in thin coats, allowing proper drying time between layers.

Add non-slip additives or decorative flakes if desired, then seal the surface for extra durability.

Let the floor cure fully before moving items back in, and clean regularly to maintain the finish.

floor painting

Step-by-Step Guide to Garage Floor Painting

Step 1. Plan and Choose Materials

Start by understanding the available paint types, selecting the right one for your needs, and preparing all necessary tools and materials.

Types of Garage Floor Paint

  • Epoxy Garage Floor Paint: Offers a hard, durable surface that resists stains, chemicals, and abrasion. It’s ideal for high-traffic garages and gives a glossy, professional finish.
  • Acrylic Garage Floor Paint: Easier to apply and dries faster than epoxy. While not as strong, it works well for light-use garages or temporary coatings.
  • Polyurethane Paint: Offers strong flexibility with excellent resistance to chemicals, abrasion, and impact. This is often used as a topcoat over epoxy for added protection and gloss. It performs well in varying weather but may lose some shine under intense sunlight over time.

Choosing the Right Paint

Knowing how to pick the right paint depends on the garage’s usage, environment, and desired look. For those new to how to paint a garage floor, keeping it simple and practical helps.

  • Durability Needs: For garages with heavy vehicles or lots of foot traffic, epoxy is the most durable choice.
  • Climate Conditions: In areas with moisture or temperature swings, polyurethane or epoxy handles expansion and contraction better.
  • Finish Preference: For a glossy, showroom look, epoxy is the top option. For a flat, simpler appearance, acrylic may be enough.
  • Budget Considerations: Acrylic is generally cheaper and easier to apply, but it may not last as long.

Tools and Supplies Checklist

Having the right tools on hand saves time and keeps the process smooth. This basic list is essential for anyone learning how to paint a garage floor correctly.

  • Floor Paint (Epoxy, Acrylic, or Polyurethane): The main product for coating the concrete surface
  • Concrete Cleaner or Degreaser: Used to remove oil, dirt, and stains before painting.
  • Etching Solution (If Needed): Helps roughen smooth concrete so the paint sticks better.
  • Paint Roller with Extension Pole: Allows easy and even application over large floor areas.
  • Paint Tray and Liners: Used for holding and applying paint without a mess.
  • Painter’s Tape and Plastic Sheeting: Protects walls and edges from splashes or spills.
  • Protective Gear (Gloves, Mask, Goggles): Ensures safety when working with chemicals.
  • Crack Filler or Patch Compound: Fills in any cracks or holes before painting.

Step 2. Prepare the Surface

Before applying any type of garage floor coating, preparing the surface is the most important step. A clean and smooth floor helps the paint stick better and last longer. This is true whether using epoxy garage floor paint, concrete floor paint, or any other type of garage floor coating.

Clean the Floor

Cleaning the garage floor removes dirt, oil, and stains that can prevent the paint from bonding properly

  • Sweep the Surface: Remove dust, leaves, and debris using a stiff-bristle broom.
  • Degrease Oil Spots: Use a degreaser or heavy-duty cleaner to scrub oil or grease stains until fully removed

Repair Cracks and Holes

Fixing cracks and holes is necessary to create a flat, strong surface before painting the garage floor.

  • Fill Small Cracks: Use a concrete crack filler or patching compound for hairline cracks. Smooth it out with a putty knife.
  • Repair Larger Damage: For bigger holes or chips, use a heavy-duty concrete repair product. Allow it to cure as directed.
  • Sand the Repairs: After drying, sand the area to level it with the rest of the floor.

Etch the Concrete (If Needed)

Etching opens the surface of the concrete so the paint or epoxy garage floor paint can soak in and stick better, which is a crucial step in learning how to paint a garage floor for long-lasting results.

  • Use a Concrete Etching Solution: A concrete etcher, usually made from a mild acid, is applied with a mop or brush.
  • Work in Small Sections: Apply the solution in sections and scrub it in using a stiff broom.
  • Rinse Thoroughly: Wash away all residue with clean water and let the floor dry. Etching is usually needed unless the concrete is already porous.

Ensure the Floor is Dry

A fully dry floor is key for a strong, long-lasting finish. Moisture trapped under paint can cause blistering or peeling.

  • Allow 24 to 48 Hours for Drying: Drying time depends on the weather and how wet the floor got during cleaning or etching.
  • Test for Moisture: Tape a plastic sheet to the floor for 24 hours. If moisture collects underneath, the floor needs more time to dry.
  • Use Fans or Open Garage Doors: Air circulation helps speed up drying, especially in humid areas.

Step 3.  Prime the Floor (Optional but Recommended)

Before applying any garage floor coating, adding a primer can make a big difference in how well the paint sticks and how long it lasts. While it’s not always required, using a primer is strongly recommended—especially when working with epoxy garage loor paint or other types of concrete floor paint.

Why Use Primer?

Primers serve multiple purposes during the process of painting a garage floor, especially when the concrete is older, stained, or slightly porous. Understanding its role helps ensure a long-lasting result.

  • Surface Sealing: Primer fills in pores in the concrete, sealing the surface and making it more uniform for the paint to stick to.
  • Improved Adhesion: It helps the main coat of epoxy garage floor paint or concrete floor paint grip better to the surface, reducing the chances of peeling or bubbling.
  • Moisture Barrier: Some primers help block moisture coming up through the concrete, which can otherwise cause the paint to lift over time.
  • Enhanced Finish: Using a primer can help give the final coat a smoother, more even look with fewer imperfections.

How To Apply Primer

Applying primer the right way is just as important as choosing the right one. Proper application ensures the garage floor coating works as expected and gives a clean, pro-level finish.

  • Clean the Floor Thoroughly: Make sure the surface is free from oil, dust, or moisture. A clean surface is key to good adhesion.
  • Mix the Primer Well: Follow the manufacturer’s instructions and stir the primer thoroughly so the formula is even throughout.
  • Use the Right Tools: A long-handled roller works best for spreading primer smoothly across the floor without streaks or bubbles.
  • Apply in Sections: Work in small areas to make sure the coverage is even and no spots are missed.
  • Let It Dry Fully: Always let the primer dry for the recommended time before applying the top coat. This could take several hours, depending on the product and room conditions.

Step 4. Paint the Floor

Painting transforms a plain concrete floor into a cleaner, more durable surface. Using the right tools and following each step carefully leads to a smooth, long-lasting garage floor coating.

Mixing and Applying Paint

Proper mixing ensures the paint performs as expected. Without it, the finish may fail or peel early.

  • Mix According to Instructions: Paints like epoxy garage floor paint often come in two parts that must be combined in the correct ratio. Following the instructions ensures proper chemical bonding for durability.
  • Use a Mixing Paddle: A mixing paddle attached to a drill blends the paint thoroughly without leaving clumps. This creates a smooth texture and even color distribution across the surface

Techniques for Even Coverage

Applying paint the right way helps avoid patchiness and roller marks. The method matters just as much as the materials.

  • Use a Roller with an Extension Pole: A roller provides an even spread of concrete floor paint, and the pole makes it easier to cover larger areas without bending or kneeling. It also helps maintain consistent pressure for a uniform look.
  • Cut In the Edges First: A brush should be used to carefully paint around edges, corners, and obstacles before rolling the main floor. Doing this ensures all sections are coated without leaving gaps.
  • Work in Small Sections: Dividing the garage into small areas prevents the paint from drying before it’s spread evenly. This approach is especially important when working with epoxy garage floor paint, which can set quickly.

Applying Multiple Coats

More than one coat is usually needed for a strong, solid finish. It improves coverage and extends the life of the paint.

  • First Coat as Base Layer: The first coat usually penetrates the concrete and may look uneven, but it builds a solid base for the second layer. It helps the next coat bond more effectively.
  • Second Coat for Coverage and Strength: A second coat smooths out the finish and covers any light patches from the base layer. This step is essential for areas with high foot or vehicle traffic.

Recommended Drying Times

Drying and curing times are crucial for durability. Rushing the process can cause the paint to peel or wear out fast.

  • Drying Time Between Coats: It’s typically best to wait 12–24 hours before applying a second coat of garage floor coating. Painting too soon can trap moisture and weaken adhesion.
  • Full Cure Time: Wait at least 72 hours before parking vehicles or placing heavy items on the surface. Curing time allows epoxy garage floor paint and similar products to fully harden and reach maximum strength.

Step 5. Add Finishing Touches

Once the paint is applied, adding final details can enhance both function and appearance. These optional extras help complete the garage floor coating like a pro.

Anti-Slip Additives (Optional)

Smooth floors can get slippery, especially when wet. Anti-slip options improve safety without affecting the overall look

  • Improved Safety: Anti-slip granules or powders are mixed into the paint or scattered on top to create texture. They help reduce the chance of slipping, especially in wet or oily spots.
  • Easy to Use: Most anti-slip products work with concrete floor paint, epoxy, or other coatings without affecting the color. This simple addition makes the floor safer without changing the overall design.

Decorative Flakes or Sealers (Optional)

These extras add a polished, high-end finish. They also protect the floor and help hide everyday wear.

  • Decorative Flakes: Colored flakes can be added to wet garage floor coating for a speckled effect that hides dirt and adds visual interest. They come in different sizes and colors for a custom finish.
  • Clear Sealers: A topcoat of clear sealer locks in flakes, adds shine, and increases resistance to stains and wear. Using a sealer also makes cleaning easier and extends the life of epoxy garage floor paint.

Step 6. Cure and Do Maintenance

After painting a garage floor, proper curing and routine maintenance are key to keeping the finish looking clean and lasting longer. Whether using epoxy garage floor paint, concrete floor paint, or another type of garage floor coating, skipping these steps can lead to early damage.

Typical Cure Times for Garage Floors

Different products have different drying and curing times. Knowing what to expect helps prevent damage before the coating is ready.

  • Touch Dry Time: Usually 6–12 hours after application. At this stage, the floor may feel dry, but it isn’t ready for any weight or traffic.
  • Light Foot Traffic: Typically safe after 24–48 hours: People can walk lightly on the surface, but heavy items should still be kept off.
  • Vehicle Traffic: Wait 5–7 days before parking a car. This gives the garage floor coating time to fully bond and resist tire pressure.
  • Humidity and Temperature Effects: Cooler temperatures and high humidity slow the drying process. Always check the manufacturer’s guidelines based on weather conditions.

Cleaning Tips for Painted Concrete Floors

Maintenance doesn’t have to be complicated, but there are specific methods that work best.

  • Sweep Regularly: Use a soft-bristle broom to remove dirt and grit that can scratch the paint.
  • Mop with Mild Soap: For regular cleaning, use a mop and bucket with water mixed with a few drops of mild dish soap. Avoid acidic cleaners like vinegar or lemon-based solutions, as anything with a pH below 6.5 can break down the concrete surface—especially strong acids with a pH of 3 or lower—which increases porosity and leads to long-term damage.
  • Rinse Well After Cleaning: Use clean water to rinse off soap residue and avoid buildup that can dull the finish.
  • Spot Clean Spills Immediately: Clean up oil, paint, or chemical spills right away to avoid staining or damage.

Protecting the Floor From Wear and Tear

Some simple actions can go a long way in keeping the painted surface in great condition.

  • Use Mats or Rugs in High-Traffic Areas: Floor mats near doors or workbenches catch dirt and reduce wear.
  • Add Rubber Pads Under Tires or Equipment: Protects from hot tires or heavy tools leaving marks or dents.
  • Reapply a Top Coat if Needed: Some floors benefit from a clear sealer every few years to refresh the look and protect the base layer.

Frequently Asked Questions (FAQs)

Painting a garage floor is a smart way to protect the concrete and improve the overall look of the space. It makes the floor easier to clean, reduces dust, and adds resistance to stains and chemicals. A painted floor also reflects more light, making the garage feel brighter. It’s a practical upgrade for both function and appearance.

The best options are epoxy garage floor paint, acrylic, or polyurethane coatings. Epoxy is the most durable and ideal for high-traffic garages. Acrylic is easier to apply but not as tough. Always use paint made specifically for concrete surfaces.

Yes, pressure washing is recommended to remove dirt, grease, and old coatings from the concrete. A clean surface helps the paint stick better and last longer. It also exposes any cracks that may need repairs. Skipping this step can lead to peeling or uneven results.

Sealing is not always required, but it can be helpful depending on the condition of the floor and the paint used. A primer or sealer can improve paint adhesion and block moisture. Some epoxy systems include a built-in primer. Always follow the product instructions.

One downside is that painted concrete can chip or peel over time if not prepped correctly. It may also become slippery when wet unless a non-slip additive is used. Maintenance is needed to keep it looking fresh. Moisture issues under the slab can also cause problems.

paint roller

Get Professional Help Painting the Garage Floor in Fairfield, CT!

Painting a garage floor takes time, the right materials, and solid preparation. For property owners in Fairfield, CT, looking for a smooth, long-lasting finish, Fairfield Painting Contractors offers expert services tailored to garage floor coating, including epoxy options and durable concrete floor paint. Each job is handled with care, ensuring the floor is cleaned, repaired, and finished to professional standards. 

Reach out to Fairfield Painting Contractors today and schedule garage floor painting in Fairfield, CT with trusted local experts!